What Can I Do With Hamburger Meat and Cheese
I am a busy person, just like most of you.
And I am really good at forgetting to get meat out of the freezer to thaw for supper.
I'm sure that's just me, though. 🙂
Several years ago, one too many PB&J nights broke me.
I decided that Ihad to learn how to pressure can meats.
That way I could just grab a jar from the pantry and dinner was on.
That was the best decision I ever made.
Well, that, and not killing my kids when they were teenagers…but I digress…
Now not only do I not have to try to remember to get stuff out of the freezer, I don't have the worry of losing all the meat that'sin the freezer.
And since that's happened to me3, yes 3 times, I'm a little skittish about that. 🙂
While I don't can all my meat, I do can the bulk of it. I've canned ground beef, ground venison, meatballs, stew meat, roast, chicken, and even sausage patties.
I've also canned chili, beef & veggie soup, chicken soup, and meat pie fillings.
It has been truly an amazing time saver and convenience to have these things all ready to go when I am.

How to Use Canned Hamburger
I use the jars of ground meat for tacos, nachos, enchiladas, and taco soup. (Mexican food anyone?)
I also use it for homemade hamburger helper type meals, spaghetti, and all kinds of casseroles and skillet dishes.
I have even been known to use it for meatloaf!
So ground meat has become a staple in my canning pantry.
It's easy to do, but does take some time in the canner. I usually take my laptop into the kitchen and clean out my email while I'm canning meat.
So follow along as I show you how easy it is to can hamburger meat.
I've found that I can get about a pound of hamburger into a pint jar. Which is perfect.
My pressure canner will hold 8 pint jars, so I process ground meat 8 pounds at a time.
Sometimes I use just ground beef, sometimes I mix it with venison, elk, or bison. The process is the same which ever type of meat you use.
Meat MUST be processed in a pressure canner.
Need more pressure canning recipes? Grab your copy of The Basics of Pressure Canning. And get started on your journey to food self sufficiency today.
How to Can Hamburger Meat
Ok, for pressure canning 8 pints of ground meat you will need:
- Ground meat – 8 1/2 to 9 pounds depending on the fat content. The more fat, the more you will need, because some of the fat will render out during browning.
- 8 pint jars
- 8 rings with new lids
- boiling water (or broth) to fill jars
- water for canner
- jar lifter
- lid lifter
- canning funnel
- bubble popper
- old towels
- and, pressure canner (duh, right?)
- white vinegar – this is optional. I use just a splash in the canner to cut the hard water residue on my jars and lids. If you don't have hard water you don't need to add any.
So here's my canning routine.
I put the jars in the dishwasher and get it started. I do this even with brand new jars. The new ones smell kind of funky and I have no idea what's gotten inside them.
I put the lids and rings into a Dutch oven. I'm going to add enough water to cover the lids and rings.
I know that's how much water I need to put in my canner. So I heat the lids and rings in it and then put it into the canner when I'm ready to can.
Check the manual that came with your canner to find out how much water should be in your's when you can.
I know that it takes about an hour and a half for my dishwasher to go through washing and get to the dry cycle.
When the dishwasher hits the "rinse" cycle I begin browning the meat. All I want to do here is brown it very lightly. It will still have some pink in it.
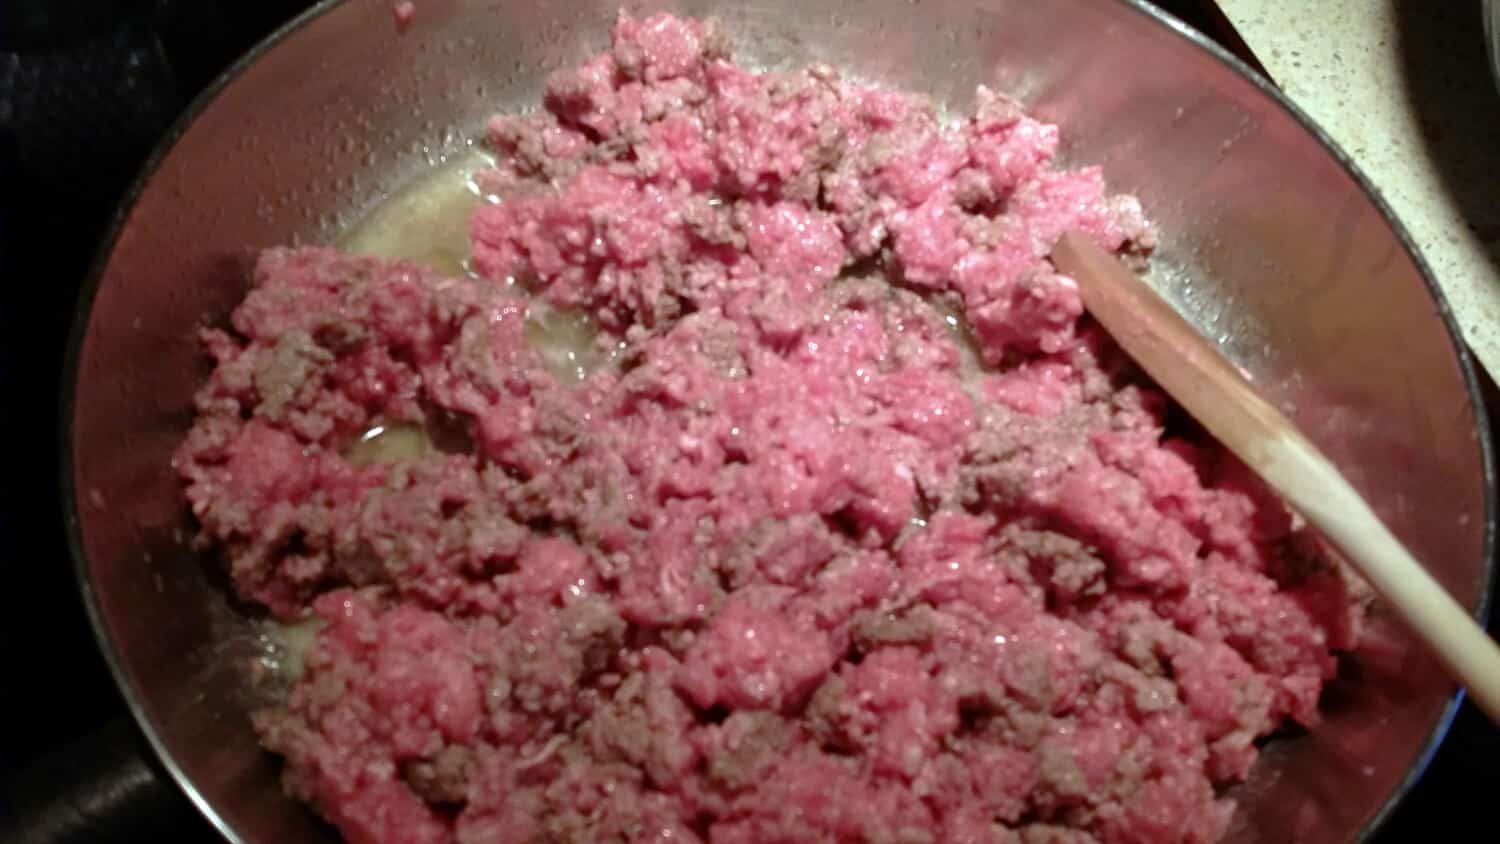
browning hamburger meat for pressure canning
We aren't wanting to cook the meat, that will happen in the canner.
I've found that lightly browning it keeps it from cooking into a big lump in the jar. It also renders out some of the fat so there is less of that in the jar.
I always make it a point to use the wide mouth jars when I can meats. It's easier to get the meat in before canning, and easier to get it out after canning.
As each batch of meat is browned, I use a slotted spoon to put it in a bowl and start the next batch.
When I start browning the last batch of meat, I grab that Dutch oven with the rings and lids and put that on the stove on high heat. When that comes to a boil, I turn it down to a simmer. And the meat is usually all browned by then.
Filling the Jars
At this point, I have browned meat, I have hot jars in the dishwasher, and I have rings and lids in hot water. So it's time to put on the kettle to get that water boiling.
I grab one of my many pizza pans, put the hot jars on it, and take it to the counter where I'm working.
Then I get my canning funnel and get to work filling up the jars with meat. I normally just divide it up among the 8 jars so I have about a pound in each jar.
You don't need to pack it down tightly, just make sure you leave 1 inch of headspace.
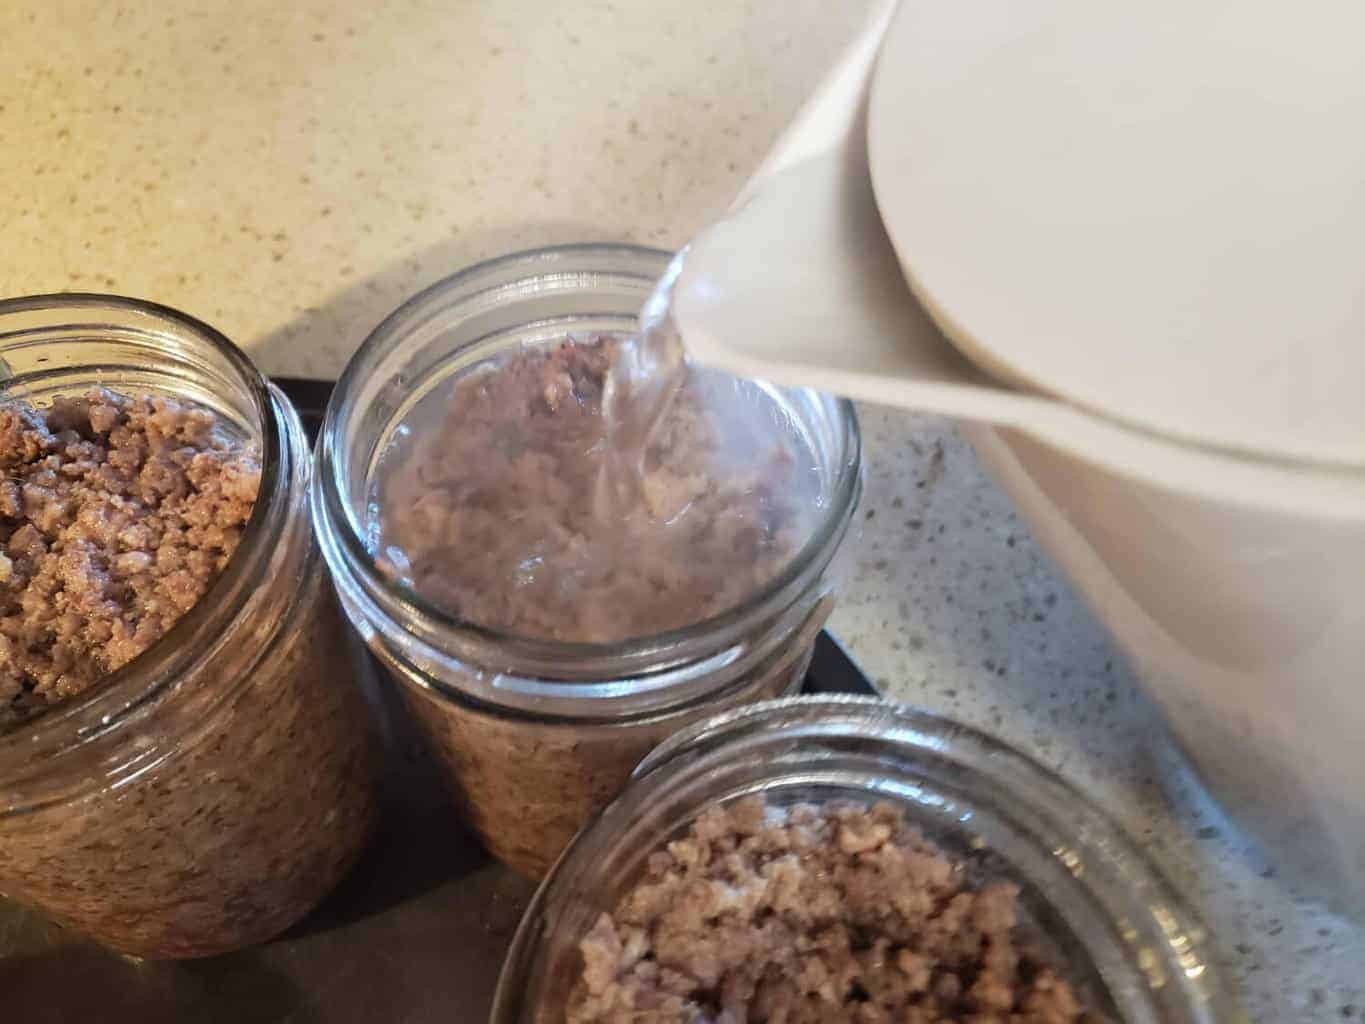
adding boiling water
Once you have finished putting the meat in the jars, your next step is to add boiling water. Just pour it over the meat. Make sure you still leave that 1 inch of headspace.
You don't have to add water. You could add broth if you wanted to.
Or you can toss a teaspoon of bouillon into the bottom of the jar before you add the meat. Then when you add the water, you'll have broth. Whatever you want to do here is just fine.
After you have added your boiling liquid, take a thin knife or bubble popper and slide it around the inside of the jar to release any air bubbles that might be trapped. I usually poke it down in the middle a few times too.
Then top off the liquid if you need to. You want to just have that 1 inch of headspace.
Now all the poking is done, take a clean dishcloth or rag and dip it in hot water to wipe the rims of the jars. You want to make sure there is no meat or fat on the rim that could interfere with the seal.
Now it's time for the lids.
Using a lid lifter magnet or a pair of tongs, grab the lids out of the hot water and seat them on the jars. Now grab the rings and screw those on finger tight.
The rings keep the lids in place so they can form a seal after processing. If the rings are on too tight, it will cause the lids to buckle and not seal. So I tighten them down and then back them off a skosh.
Processing
Now that all the lids and rings are out of the Dutch oven, I pour that water into my canner. This is where I add a splash of white vinegar to cut down on the hard water residue on my jars.

in the pressure caner ready to go
Then I put the jars in, seal the lid, and turn the heat on high.
Please check your manual for the length of time your canner needs to exhaust before you put the regulator on and bring it up to temperature.
I need to process pint jars of ground meat for 90 minutes at 10 pounds of pressure.
Always check the Altitude Adjustment Chart before you start so you know what your pressure needs to be!
After I add the regulator and the canner is up to the proper pressure I set my timer. You may need to fiddle with the heat to keep the canner at the proper pressure for the correct amount of time.
If the pressure drops below what it should be, you have to bring it back up to the proper level and re-start your processing time.
After Processing
After processing, turn off the heat and allow the canner to cool off and the pressure to return to zero.
Never cool off a pressure canner with water. Never open a pressurized canner. And never remove the regulator from a pressurized canner.
Any of those things will cause the jars inside to explode and may cause the canner to warp and be unusable.
When the pressure has returned to zero, carefully remove the jars with the jar lifter. The jars will still be extremely hot and the contents will be boiling.

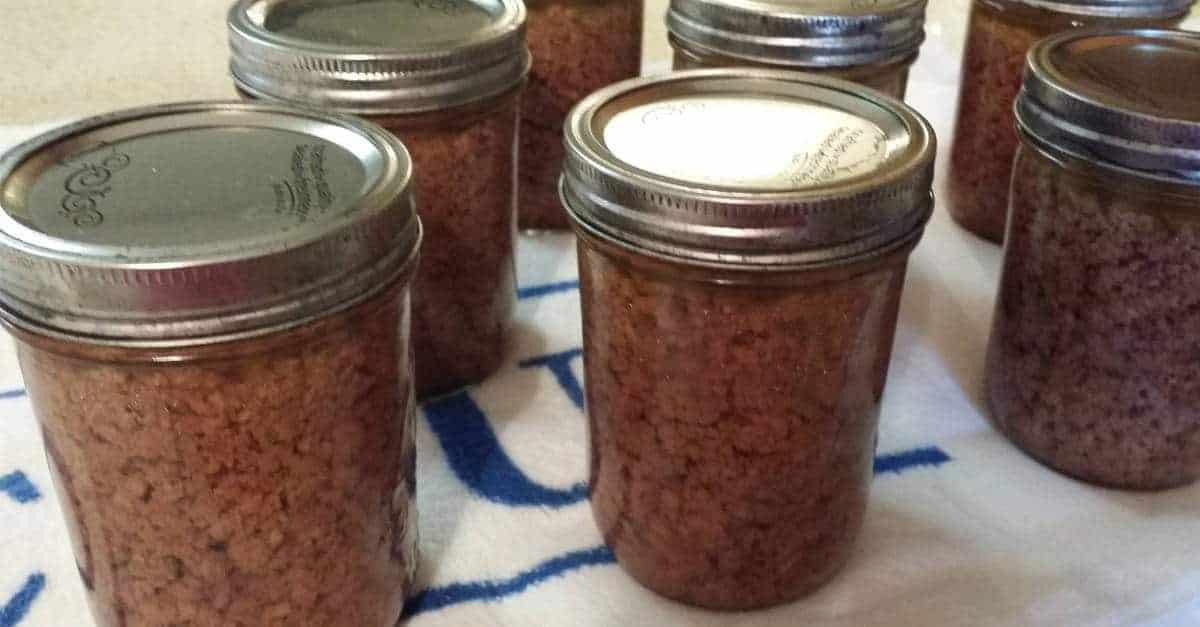
jars of hamburger right out of the canner
Also, the jars are not sealed yet, so you need to lift the jars straight up out of the canner without tilting them.
Don't leave your jars in the canner overnight. The jars need to cool off faster than they would if they were still inside the canner. Leaving them in can cause a thing called "flat sour". It's not dangerous, but will give foods an "off" taste.
Put your jars on a towel lined cabinet and leave them undisturbed for 12 to 24 hours. After 12 hours you can check the seals.
Storing your Canned Hamburger Meat
If all the jars are sealed, remove the rings, wipe down the sides of the jar, and label and date the contents.
If you are going to put the rings back on for storage, make sure they are washed and completely dry. And don't put them on tightly.
Now store them in your pantry in a cool, dark place.
There will be a layer of fat at the top of the jars. That is perfectly normal and perfectly safe.

hamburger meat after cooling
How much there will be depends on how much fat was in the meat to start with, and how much fat rendered off when you browned it.
You can scrape it off and discard it when you open the jars, or you can leave it. I usually scrape it off and use it to fry onions or garlic before I add the meat to the pan.
The meat is already cooked, so all you have to do is heat it up. And that makes dinner so much faster to get on the table!
Always a win in my book!
What is your favorite hamburger dish this would work for?
More pressure canning recipes you should try:

What Can I Do With Hamburger Meat and Cheese
Source: https://www.backtoourroots.net/canning-hamburger-ground-meat/